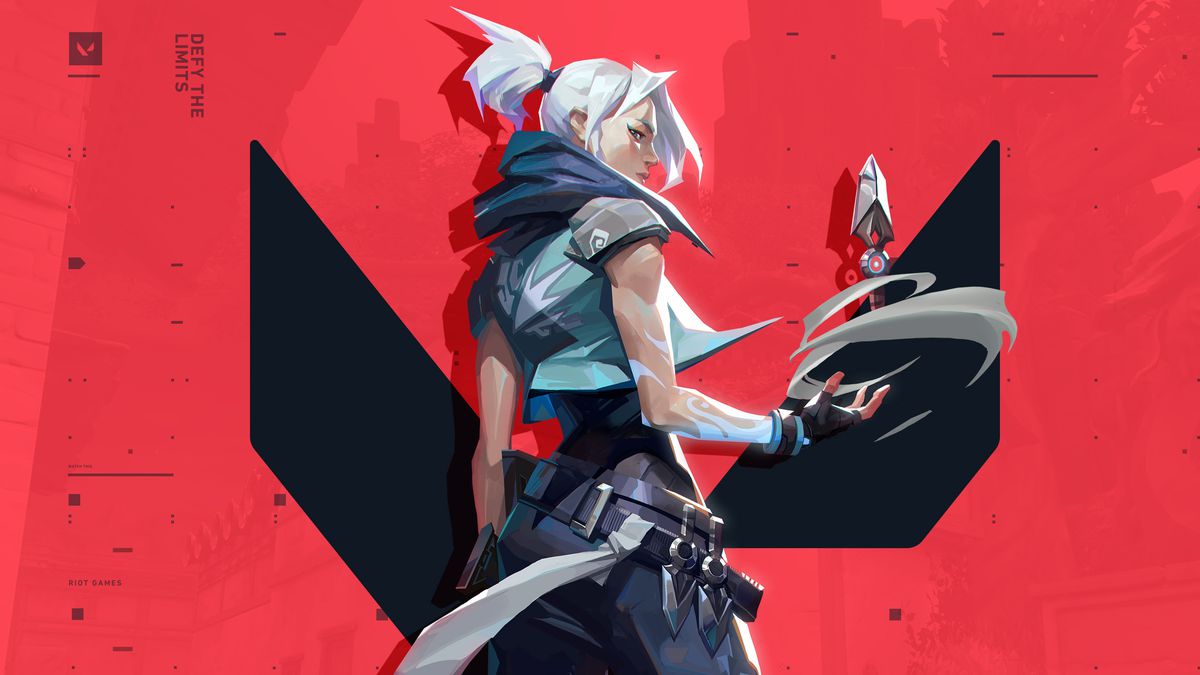
Valorant has slowly become one of the most popular games in the current online shooter market. Combining the mechanics of various other kinds of online shooters in this bizarre hybrid of genres has proven to be a winning formula for Riot. Valorant feels like a combination of games like Rainbow Six Siege, Counter Strike, and Team Fortress 2 in order to create an experience that feels both familiar and unique.
Since its release, Riot Games have released various new agents for Valorant, starting with a modest number of about 12 agents (operators), the game now features 18 widely different agents with the 20th agent out just now, each offering a distinctly unique playstyle. Because of this, it can be hard to figure out which Agent works best for whom and which agent is best for which situations.
This is why we have compiled this tier list of all the Valorant agents (full roster), ranked by their skills and abilities. This tier list will be divided into 5 tiers from D-S, where S will be the most superior tier. As mentioned earlier, this list reflects the balance updates and changes introduced with Valorant Patch 5.09, so make sure you check back again once the new patch is released.
To summarize this entire Valorant roster tier list of agents, you can read through the table below:
| Tier | Agents |
|---|---|
| D | Yoru, Phoenix |
| C | Brimstone, Omen, KAY/O, Neon |
| B | Raze, Astra, Cypher, Killjoy, Breach, Viper |
| A | Chamber, Sage, Reyna, Jett, Harbor |
| S | Skye, Sova, Fade |
D-Tier:
All the Valorant agents listed in this tier are situational at best. They can be viable in very particular niches but lack the all-encompassing utility afforded by the other agents.The D-Tier includes: Yoru, Phoenix.
Yoru
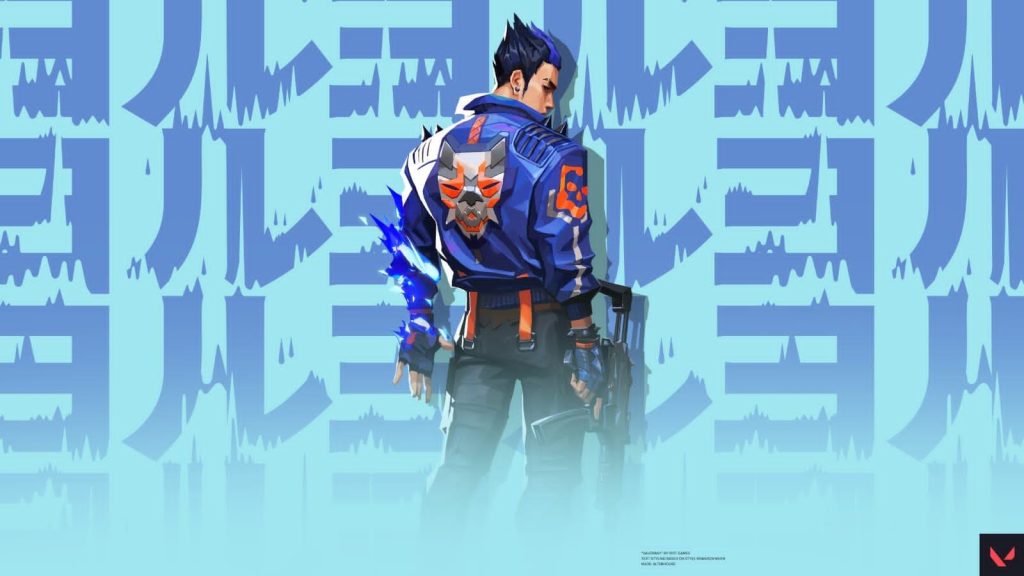
Role: Duelist
Signature Ability: Gatecrash
Yoru is a unique Duelist agent in Valorant in that he relies on surprise play and tactics to gain his advantage.
Skills:
Yoru’s kit is centered around deceiving the enemy and getting as many surprise kills as he can. His kit affords flanking and confuses the enemy team with his utilities. His utilities are:
- Gatecrash – EQUIP a rift tether FIRE to send the tether forward ALT FIRE to place a stationary tether ACTIVATE to teleport to the tether’s location USE to trigger a fake teleport.
- Fakeout – EQUIP an echo that transforms into a mirror image of Yoru when activated FIRE to instantly activate the mirror image and send it forward ALT FIRE to place an inactive echo USE to transform an inactive echo into a mirror image and send it forward. Mirror images explode in a blinding flash when destroyed by enemies.
- Blindside – EQUIP to rip an unstable dimensional fragment from reality. FIRE to throw the fragment, activating a flash that winds up once it collides with a hard surface in the world. Basically, a flash that has to be bounced off a surface.
- Dimensional Drift – EQUIP a mask that can see between dimensions. FIRE to drift into Yoru’s dimension, unable to be affected or seen by enemies from the outside.
Quick Tips:
- Use your Fakeout to trick your opponents. You can place both of them and activate them towards one site, while you and your team sneak towards the other.
- If you are in your Ultimate and placed your teleporter before entering it, you can press Gatecrash -> Dimensional Drift to cancel the Ultimate exit animation and instantly teleport.
- Your Gatecrash can be heard very easily. Always combine it with your Blindside or your team’s flash to suppress it’s sound.
Recommended Maps:
As a Duelist, Yoru can work well on most maps due to his ability to let him pick his fights and avoid engagements as he pleases thanks to his good mobility.
Yoru is one of the least used characters in the Valorant meta due to his relatively weak utility and slow flashes. While Yoru offers a lot of engaging options and opportunity for big plays, he falls short in comparison to some of the other agents in Valorant.
Phoenix
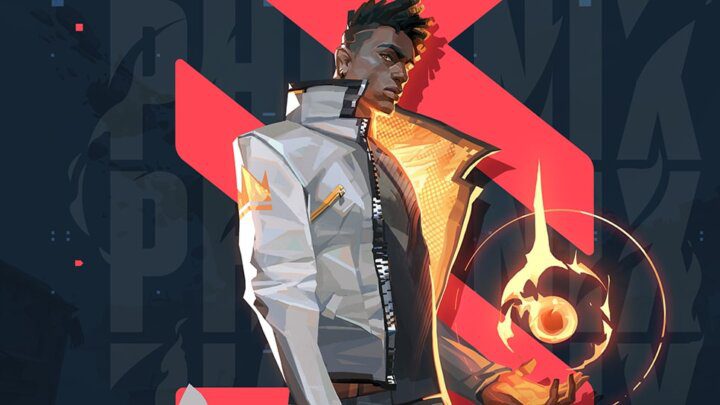
Role: Duelist
Signature Ability: Hot hands
Phoenix is a very good all rounder duelist that is a very safe pick for newcomers to the game who want an easy to approach frag focused character.However, Phoenix’s utility isn’t the best at anything. His flashes are easily turnable and require quite extensive map knowledge to pull off effectively.
Skills:
- Hot Hands – EQUIP a fireball. FIRE to throw a fireball that explodes after a set amount of time or upon hitting the ground, creating a lingering fire zone that damages enemies. Charge/s: 1 (2 Kill Recharge)
- Blaze – EQUIP a flame wall. FIRE to create a line of flame that moves forward, creating a wall of fire that blocks vision and damages players passing through it. HOLD FIRE to bend the wall in the direction of your crosshair. Charge/s: 1 (N/A Ability Recharge)
- Curveball – EQUIP a flare orb that takes a curving path and detonates shortly after throwing. FIRE to curve the flare orb to the left, detonating and blinding any player who sees the orb. ALTERNATE FIRE to curve the flare orb to the right. Charge/s: 2 (N/A Ability Recharge)
- Run it Back – INSTANTLY place a marker at Phoenix’s location. while this ability is active, dying or allowing the timer to expire will end this ability and bring Phoenix back to this location with full health. Charge/s: 1 (6 Ultimate Points)
Quick Tips:
- A useful ability combo to have in your repertoire is to use your Blaze to wall off an opponent and then throw a Curveball through it to blind them.
- You can curve Phoenix’s Blaze, making walls that wouldn’t be possible with the likes of viper. To curve your Blaze you need to hold FIRE whilst the wall is being deployed and move your mouse in the direction you want the wall to curve to.
- After a firefight, smart opponents will know that you may retreat behind cover to heal yourself with Hot Hands by throwing it on the ground. Depending on the situation, you can use this to your advantage by throwing it away from you so that when they peek to kill you, you can shoot them in the back.
- When playing on Bind, you can make creative plays by using Run it Back in combination with the teleporters.
Recommended Maps:
- Bind
- Ascent
- Fracture
Read More: Best Valorant Settings Guide for Max FPS Optimization & High Performance
C-Tier:
These are okay pics if you’re either aiming for a specialized playstyle or characters that have fairly situational use. You might see this tier shuffled very frequently from time to time. Just like the D-tier, the C-tier agents just don’t provide enough utility to both halves of the game to warrant a spot on the A-tier. The C-Tier includes: Brimstone, Omen, KAY/O, Neon.
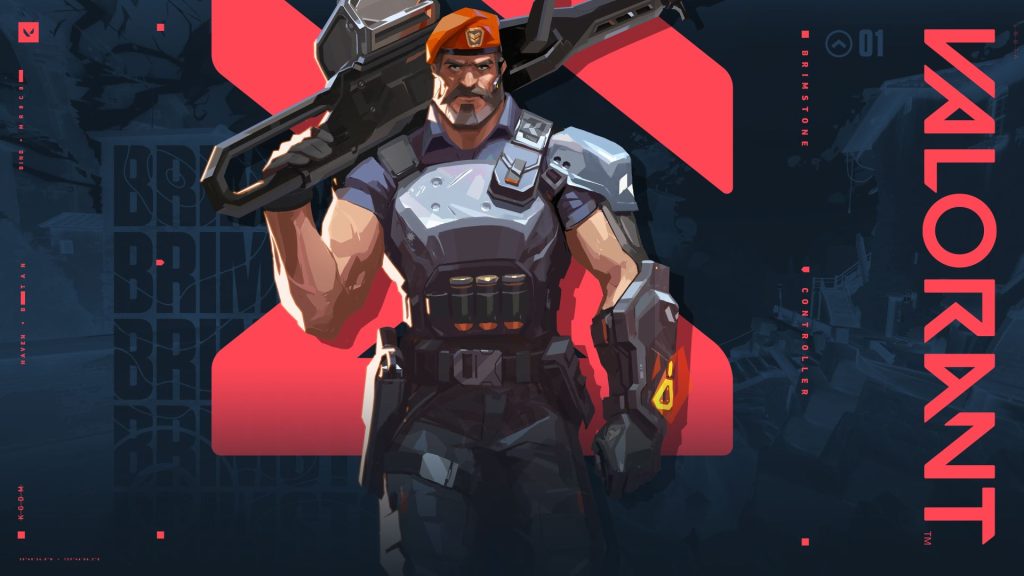
Brimstone
Role: Controller
Signature Ability: Sky Smoke
Starting off C-tier we have Brimstone, another support character who’s very good at controlling the map, setting up choke points and providing utility to his teammates in the form of a combat stim.
Skills:
- Sky Smoke – EQUIP a tactical map. FIRE to set locations where Brimstone’s smoke clouds will land. ALTERNATE FIRE to confirm, launching long-lasting smoke clouds that block vision in the selected area. Charge/s: 3 (19.25 Ability Recharge)
- Stim Beacon – EQUIP a stim beacon. FIRE to toss the stim beacon in front of Brimstone. Upon landing, the stim beacon will create a field that grants players RapidFire. As of patch 4.04 Brimstone’s stim beacon also applies a 15% speed boost to anyone who walks in the area of effect. Charge/s: 1 (N/A Ability Recharge)
- Incendiary – EQUIP an incendiary grenade launcher. FIRE to launch a grenade that detonates as it comes to a rest on the floor, creating a lingering fire zone that damages players within the zone. Charge/s: 1 (N/A Ability Recharge)
- Orbital Strike – EQUIP a tactical map. FIRE to launch a lingering orbital strike laster at the selected location, dealing high damage-over-time to players caught in the selected area. Charge/s: 7 Ultimate Points.
Quick Tips:
- Brimstone’s Sky Smoke is one of the most useful abilities in the game due to the sheer amount of situations you can use it in. For example, one round you can use it to block a sniper angle to help you rush a site. The next round, you can use it to fake that you’re looking to attack another site. Regardless of how you use it, be sure to coordinate with your allies to get the most value out of your three charges.
- Rapid fire, the buff from Brimstone’s Stim Beacon , is often used as an engage tool but it has other uses. For example, when you hear enemies approaching, you can throw it away from you to make them think that you are in the other corner of a room. When they come in to engage, this can set you up for shooting from behind them. Just be aware that enemies will also receive a buff when within the Stim Beacon ‘s range.
- Orbital Strike is one of the best abilities for stopping a spike plant or defusal due to its large area of effect and its relatively long duration. You can often win a round this way, especially if there isn’t much time left.
- Brimstone’s Sky Smoke can also be used to set up pesky one ways. Where you can see the opponents legs whilst they have their vision completely blocked. This usually nets 4 kills per match minimum. Use sparingly as the opponent will catch on relatively quickly.
Recommended Maps:
- Bind
- Fracture
- Haven
- Split
Brimstone is a simple character with a versatile and easy to understand kit. His accessibility alongside his great utility make for one of the best starting operators in Valorant. Agents that primarily are used to smoke off line of sight are needed in every match regardless of efficacy.
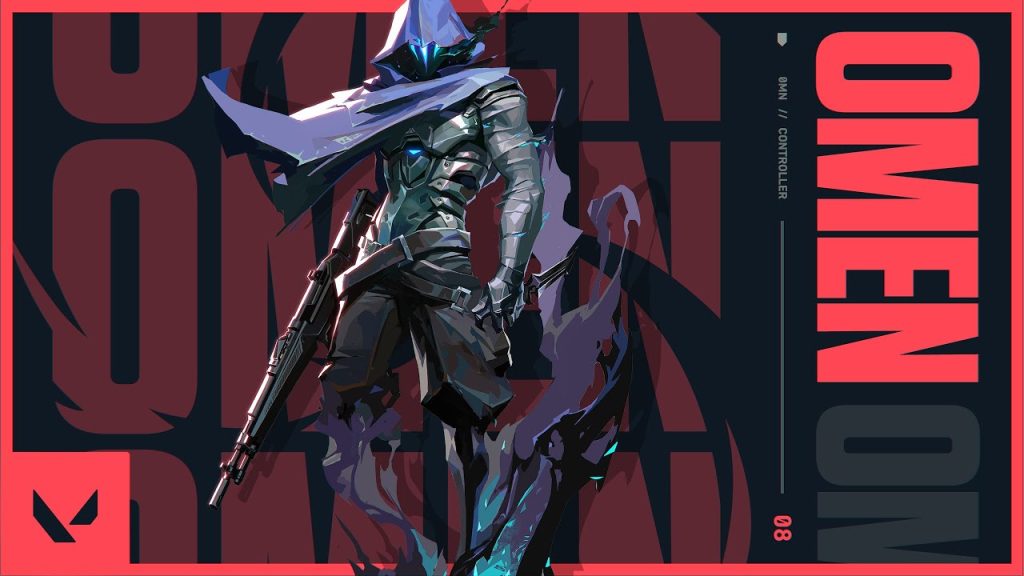
Omen
Role: Controller
Signature Ability: Paranoia
Edgy McGee is a Controller agent that can blind approaching enemies or set up good ambushes using his flashes and teleports. His kit also helps him excel at confusing his enemies. Omen is an exceptional lurk agent as his smokes have infinite distance as opposed to Brimstone’s, who needs to be in the vicinity to smoke off angles.
Skills:
- Paranoia – INSTANTLY fire a shadow projectile forward, briefly reducing the vision range of all players it touches. This projectile can pass straight through walls. Charge/s: 1 (N/A Ability Recharge)
- Dark Cover – EQUIP a shadow orb and see its range indicator. FIRE to throw the shadow orb to the marked location, creating a long-lasting shadow sphere that blocks vision. HOLD ALTERNATE FIRE while targeting to move the marker further away. HOLD the ability key with targeting to move the marker closer. Charge/s: 1 (30s Ability Recharge)
- Shrouded Step – EQUIP a shadow walk ability and see its range indicator. FIRE to begin a brief channel, then teleport to the marked location. Charge/s: 1 (2 Ability Recharge)
- From the Shadows (Ultimate) – EQUIP a tactical map. FIRE to begin teleporting to the selected location. While teleporting, Omen will appear as a Shade that can be destroyed by an enemy to cancel his teleport. Charge/s: 7 Ultimate Points
Quick Tips:
- Use Omen’s Dark Cover in combination with his teleportation abilities, e.g.: you can either walk into a smoke and teleport out of it or place a smoke and teleport into it.
- Compared to other smokes in Valorant, Omen’s Dark Cover is hollow, acting like a small enclosed room. This can be a blessing or a curse based on the situation so be sure to keep it in mind.
- Omen’s ultimate, From the Shadows, is very versatile but requires sharp timing. Since it makes a very loud noise, it’s easy to let it go to waste if your opponents are ready to find and kill you. Try to use it when they are preoccupied with a firefight or when another loud ability is being used, like Brimstone’s Orbital Strike to capitalize on the chaos.
- Combine Omen’s Paranoia quickly followed by a Shrouded Step to teleport behind the enemies silently. Omen’s Paranoia near-sights the enemy and doesn’t flash their entire vision. Near-sighted enemies can see relatively close to them. So, make sure to teleport about 3 meters away from the Paranoid target.
Recommended Maps:
- Ascent
- Haven
- Split
Reaper from Overwatch can be very good in the hands of a competent player who has good map knowledge and can co-ordinate with their team.
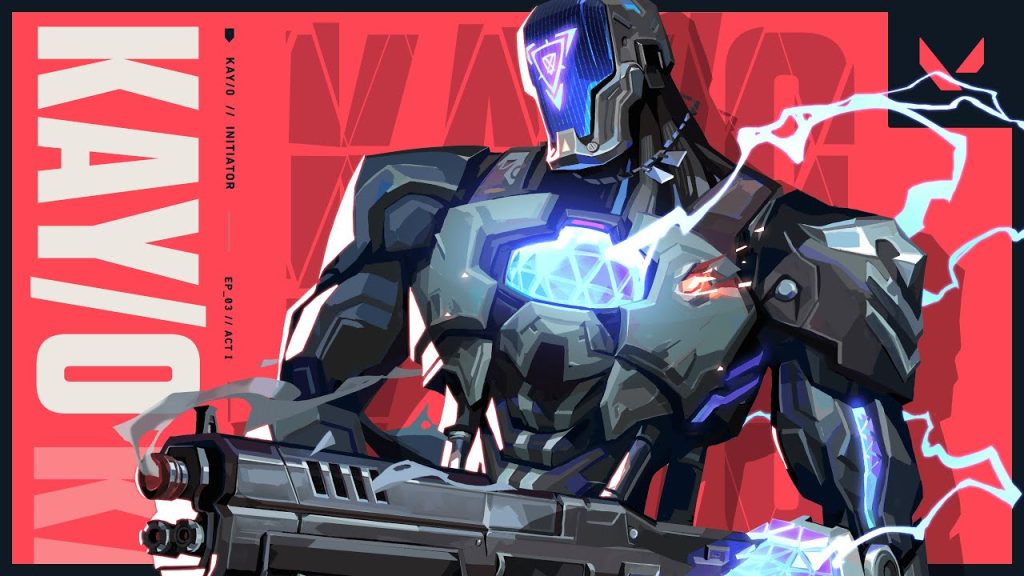
KAY/O
Role: Initiator
Signature Ability: ZERO/POINT
KAY/O is a great suppressor agent that offers a unique kit that lets your team take a fight on their own terms. This can make KAY/O strong in most team compositions.
Skills:
- FRAG/MENT – EQUIP an explosive fragment. FIRE to throw. The fragment sticks to the floor and explodes multiple times, dealing near lethal damage at the center with each explosion. Charge/s: 1 (N/A Ability Recharge)
- FLASH/DRIVE – EQUIP a flash grenade. FIRE to throw. The flash grenade explodes after a short fuse, blinding anyone in line of sight. Charge/s: 2 (N/A Ability Recharge)
- ZERO/POINT – EQUIP a suppression blade. FIRE to throw. The blade sticks to the first surface it hits, winds up, and suppresses anyone in the radius of the explosion. Charge/s: 1 (40s Ability Recharge)
- NULL/CMD – INSTANTLY overload with polarized radianite energy that empowers KAY/O and causes large energy pulses to emit from his location. Enemies hit with these pulses are suppressed for a short duration. Charge/s: 7 Ultimate Points
Quick Tips:
- KAY/O’s Suppression can cancel ultimates like Showstopper, Blade Storm and Hunter’s Fury.
- Use his underhand Flash to set yourself up to peek around corners. You’ll get partially blinded while enemies are full blinded.
- He’s a great counter to Cypher and Killjoy since he can deactivate their traps. Find them on offense and create an opening for your team.
- Make sure to use FLASH/DRIVE with the ALT FIRE since it lightly tosses the flash. Throwing the flash behind you when peeking an angle,gives the opponent no time to shoot you because they are too preoccupied with turning away, to mitigate the full flash duration. This tactic is paramount to playing KAY/O effectively and should be a skill that you should master.
Recommended Maps:
- Ascent
- Breeze
- Icebox
KAY/O is a great character to pick if players want to make sure they take engagement on their own terms but is outclasses by some other characters in the roster.
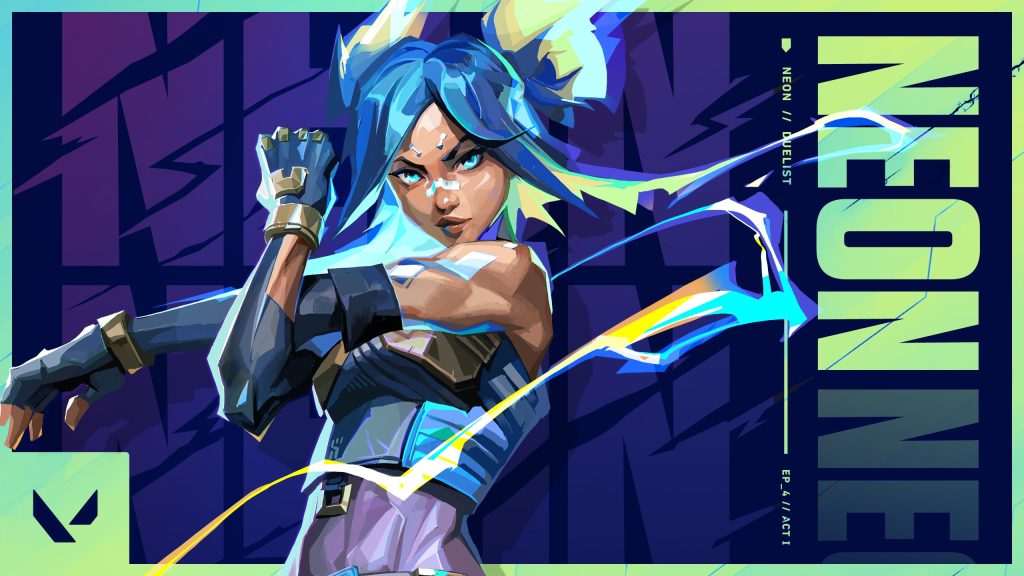
Neon
Role: Duelist
Signature Ability: High Gear
Neon possesses high offensive capability due to her skillset capable of taking duels on her own terms. Her kit allows her to be a great entry frag character and pick away any stray enemies using skills like Fast Lane.
Skills:
- High Gear – INSTANTLY channel Neon’s power for increased speed. When charged, ALT FIRE to trigger an electric slide. Slide charge resets every two kills. Charge/s: Unlimited (15s Ability Recharge)
- Fast Lane – FIRE two energy lines forward on the ground that extend a short distance or until they hit a surface. The lines rise into walls of static electricity that block vision and damage enemies passing through them. Charge/s: Unlimited (15s Ability Recharge)
- Relay Bolt – INSTANTLY throw an energy bolt that bounces once. Upon hitting each surface, the bolt electrifies the ground below with a concussive blast. Charge/s: 3 (N/A Ability Recharge)
- Overdrive – Unleash Neon’s full power and speed for a short duration. FIRE to channel the power into a deadly lightning beam with high movement accuracy. The duration resets on each kill. Charge/s: 7 Ultimate Points
Quick Tips:
- Fast Lane can be used to trap or blind enemies by placing it in front of unsuspecting players.
- Fast Lane can also be used to trap enemy pushes and set up ambushes for the enemy team.
- High Gear can be effectively used to quickly ditch engagements or enter fights away from you.
- Electric Slide can be used when peeking angles. This throws off the opponent’s crosshair placement with the added benefit of peeking the angle at a blazing fast speed.
- Don’t let anyone know that I told you this but, judge Neon on attack is a monster on maps like Split and Bind. Use with discretion.
Recommended Maps:
- Bind
- Split
Neon has a great ultimate in the form of overdrive that can be almost as powerful as Jett’s “Knives Out” with a good enough aim and an overall strong kit that provides both utility and good damage output.
Related: Best Valorant Vandal Skins (2022)
B-Tier:
Now that you have read through the not-so-favorite agents, this list will not let you down any further. The B-tier consists of really enjoyable agents that you can choose from time to time in friendly matches. The B-Tier includes: Raze, Astra, Cypher, Killjoy, Breach, Viper.
Raze
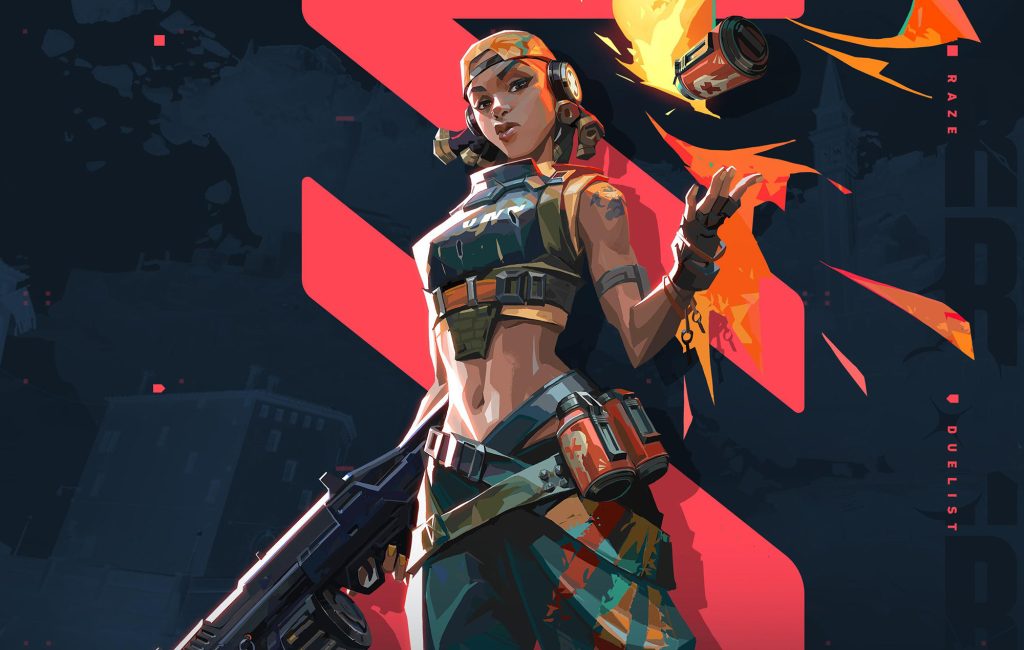
Role: Duelist
Signature Ability: Paint Shells
This duelist is an explosions master capable of rocket jumping around for skillful plays and getting picks with her explosive finesse.
Skills:
- Paint Shells – EQUIP a cluster grenade. FIRE to throw the grenade, which does damage and creates sub-munitions, each doing damage to anyone in their range. Charge/s: 1 (2 Kill Ability Recharge)
- Blast Pack – INSTANTLY throw a Blast Pack that will stick to surfaces. RE-USE the ability after deployment to detonate, damaging and moving anything hit. Charge/s: 2 N/A Ability Recharge)
- Boom Bot – EQUIP a Boom Bot. FIRE will deploy the bot, causing it to travel in a straight line on the ground, bouncing off walls. The Boom Bot will lock on to any enemies in its frontal cone and chase them, exploding for heavy damage if it reaches them. Charge/s: 1 (N/A Ability Recharge)
- Showstopper – EQUIP a rocket launcher. FIRE shoots a rocket that does massive area damage on contact with anything. Charge/s: 8 Ultimate Points
Quick Tips:
- Blast Pack can be used to boost Boom Bot into the air. Use this to kill enemies hiding behind boxes and other terrain.
- Raze’s Showstopper and Blast Pack pack both have timers as soon you activate them. Something to remember is that you can switch in between your guns and other abilities before the timers expire. For example, you can activate your Showstopper, switch to Paint Shells and throw that, jump in the air with a Blast Pack, and then shoot your Showstopper as long as its timer hasn’t ran out.
- Raze’s Paint Shells get refilled after contributing to two kills and/or assists. Keep this in mind since kills come very easy to Raze, you’ll often have rounds where you can use two and even more Paint Shells.
- Make sure to use both Blast Pack charges in quick succession. This creates a ton of momentum and can send you flying across the map. Pair this mechanic with you Showstoppper and free kills are imminent.
Recommended Maps:
- Bind
- Fracture
- Split
Raze is an excellent entry fragger that does some of the highest damage out of all the agents in Valorant, making her an excellent pic for a lot of situations.
Astra
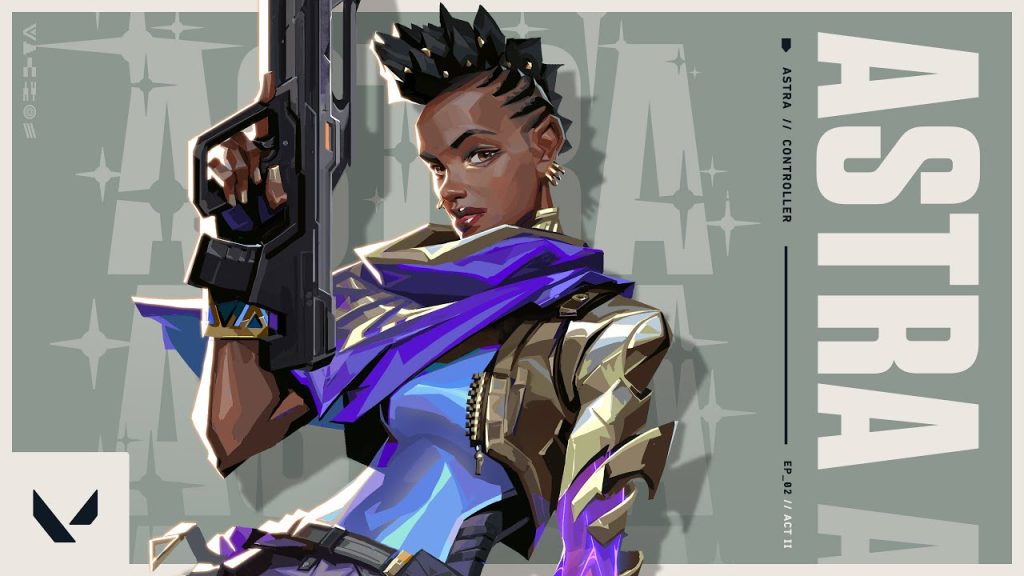
Role: Controller
Signature Ability: Nova Pulse
Astra’s kit is centered around controlling the space of any given map. Her Kit allows her to set up choke points and make it harder for the enemy team to approach her. This makes her a good character to play on defense.
Skills:
Astra’s skills go hard on her role as a controller as she can manipulate large areas of the map with her skills. Her skills include:
- Nova Pulse – Place Stars in Astral Form (X) ACTIVATE a Star to detonate a Nova Pulse. The Nova Pulse charges briefly then strikes, concussing all players in its area. Charge/s: 1 (N/A Ability Recharge)
- Nebula – Place Stars in Astral Form (X) ACTIVATE a Star to transform it into a Nebula (smoke). Use (F) on a Star to Dissipate it, returning the star to be placed in a new location after a delay. Dissipate briefly forms a fake Nebula at the Star’s location before returning. Charge/s: Unlimited (N/A Ability Recharge)
- Gravity Well – Place Stars in Astral Form (X) ACTIVATE a Star to form a Gravity Well. Players in the area are pulled toward the center before it explodes, making all players still trapped inside fragile. Charge/s: 2 (N/A Ability Recharge)
- Astral Form/Cosmic Divide (Ultimate)– ACTIVATE (X) to enter Astral Form where you can place Stars with PRIMARY FIRE. Stars can be reactivated later, transforming them into a Nova Pulse, Nebula, or Gravity Well. When Cosmic Divide is charged, use SECONDARY FIRE in Astral Form to begin aiming it, then PRIMARY FIRE to select two locations. An infinite Cosmic Divide connects the two points you select. Cosmic Divide blocks bullets and heavily dampens audio. Charge/s: 7 Ultimate points
Quick Tips:
- Don’t be stingy with your Stars. You can recall each and every one of them at any time and you can even use the recall for your advantage. That’s because when recalling a Star with “F” an only 2 seconds lasting smoke identical to a Nebula / Dissipate is set off.
- Use your own abilities in combination. For example, you can place 2 Stars right next to each other and turn one into a Nebula / Dissipate and the other one into a Gravity Well. Nearby enemies are drawn into the middle of the Nebula / Dissipate by the Gravity Well and you can easily kill them by just shooting into the smoke.
- Activate Stars placed in common choke points with a Nova Pulse at or shortly before contact. A possible use case could be to trigger a Nova Pulse at the beginning of the round in an anticipated enemy Operator peek spot. The stunning effect of Astra’s Nova Pulse de-scopes the Operator player and you are free to take the desired map control without having to fear an early death.
Recommended Maps:
- Ascent
- Haven
Astra is a great option to play for players that have good map knowledge and are also good at tactical play. The only thing that holds her back is the high skill requirement to actually master her kit.
Cypher
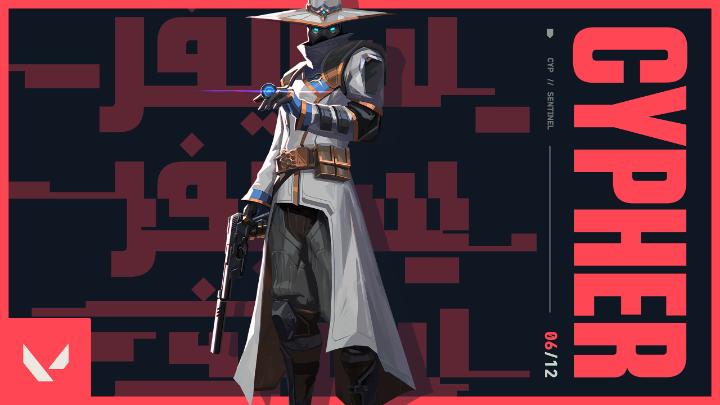
Role: Sentinel
Signature Ability: Spycam
Cypher is the newest operator in Rainbow Six Siege, he can throw around small cameras and guard unsuspecting pathways with his ability making him one of the best defensive and scout agents in the game.
Skills:
- Spycam – EQUIP a spycam. FIRE to place the spycam at the targeted location. RE-USE this ability to take control of the camera’s view. While in control of the camera, FIRE to shoot a marking dart. This dart will reveal the location of any player struck by the dart. Charge/s: 1 (15 Ability Recharge)
- Trapwire – EQUIP a trapwire. FIRE to place a destructible and covert tripwire at the targeted location, creating a line that spans between the placed location and the wall opposite. Enemy players who cross a tripwire will be tethered, and dazed after a short period if they do not destroy the device in time. This ability can be picked up to be REDEPLOYED. Charge/s: 2 (N/A Ability Recharge)
- Cyber Cage- INSTANTLY throw down a cyber cage in the direction you’re facing. Reactivate the ability with “F” to create a pseudo-smoke that give off audio and visual cues when an opponent walks in or leaves the premises. Charge/s: 2 (N/A Ability Recharge)
- Neural Theft – INSTANTLY use on a dead enemy player in your crosshairs to reveal the location of all living enemy players. Charge/s: 6 Ultimate Points
Quick Tips:
- Your camera can be a useful tool for clearing angles before pushing an area. You can often bait the eyes of an enemy and have an ally shoot them while they’re distracted.
- Try to plan ahead and know what you want to do before the buying phase of a round begins. This will give you more time to run around the map and set up your traps.
- Cypher’s Cyber Cage can be activated from anywhere as long as you’re looking at it. This includes through walls and even through his Spycam.
Recommended Maps:
- Fracture
- Split
- Bind
Cypher is one of the best operators in the game for scouting areas and guarding spike points due to his traps and spycams.
Killjoy
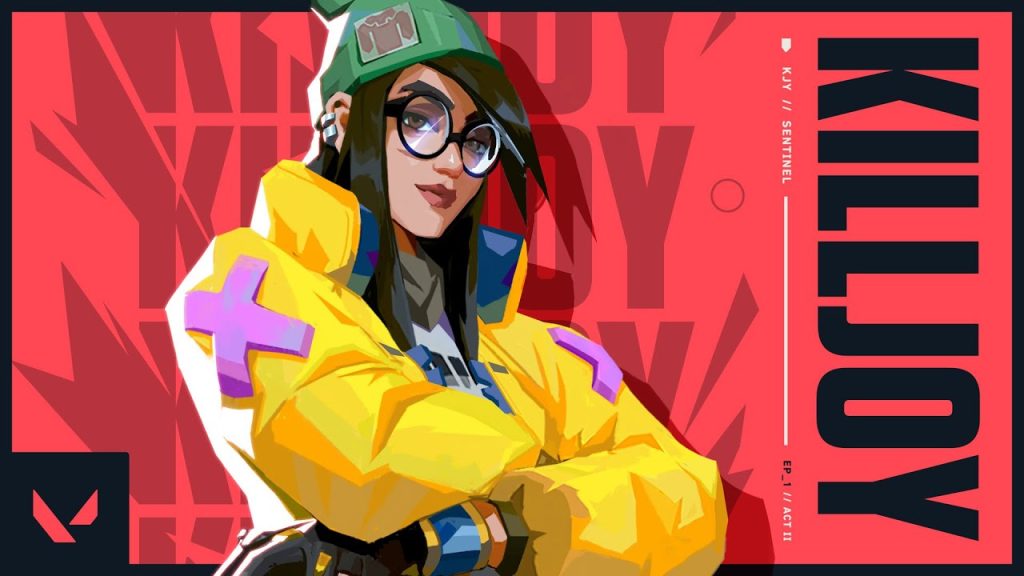
Role: Sentinel
Signature Ability: Sentinel
Killjoy can be one of the most versatile defensive characters in the game. Boasting an impressive array of gadgets, Killjoy can be a defensive powerhouse especially when defending the spike.
Skills:
- Turret – EQUIP a Turret. FIRE to deploy a turret that fires at enemies in a 180 degree cone. HOLD EQUIP to recall the deployed turret. Charge/s: 1 (45s Ability Recharge)
- Nanoswarm – EQUIP a Nanoswarm grenade. FIRE to throw the grenade. Upon landing, the Nanoswarm goes covert. ACTIVATE the Nanoswarm to deploy a damaging swarm of nanobots. Charge/s: 2 (N/A Ability Recharge)
- Alarmbot – EQUIP a Nanoswarm grenade. FIRE to throw the grenade. Upon landing, the Nanoswarm goes covert. ACTIVATE the Nanoswarm to deploy a damaging swarm of nanobots. Charge/s: 1 (N/A Ability Recharge)
- Lockdown – EQUIP the Lockdown device. FIRE to deploy the device. After a long windup, the device Detains all enemies caught in the radius. The device can be destroyed by enemies. Charge/s: 7 Ultimate Points
Quick Tips:
- Killjoy’s Alarmbot and Turret both give visual indicators on the minimap when triggered so make sure that you and your team keep an eye on them.
- Spend time in custom matches to find different placements for your Lockdown for different situations on every map.
- You can recall your Alarmbot and Turret at any time so use that flexibility to adapt to your team’s needs. For example, you could set up your turret to protect a flank and then recall it later in the round to protect the spike after your team plants it. They do have a reactivation cooldown so be sure to plan ahead
- Combining your Alarmbot and Nanoswarm for a lethal combo. The Alarmbot applies a debilitating Vulnerable effect multiplying any incoming damage by 2 fold coupled with the Nanoswarm is extremely powerful for thwarting and incoming pushes.
Recommended Maps:
- Ascent
- Haven
- Fracture
- Bind
Killjoy is an excellent defensive character that can set up a wide variety of obstacles for the enemy team making her one of the better picks in Valorant.
Breach
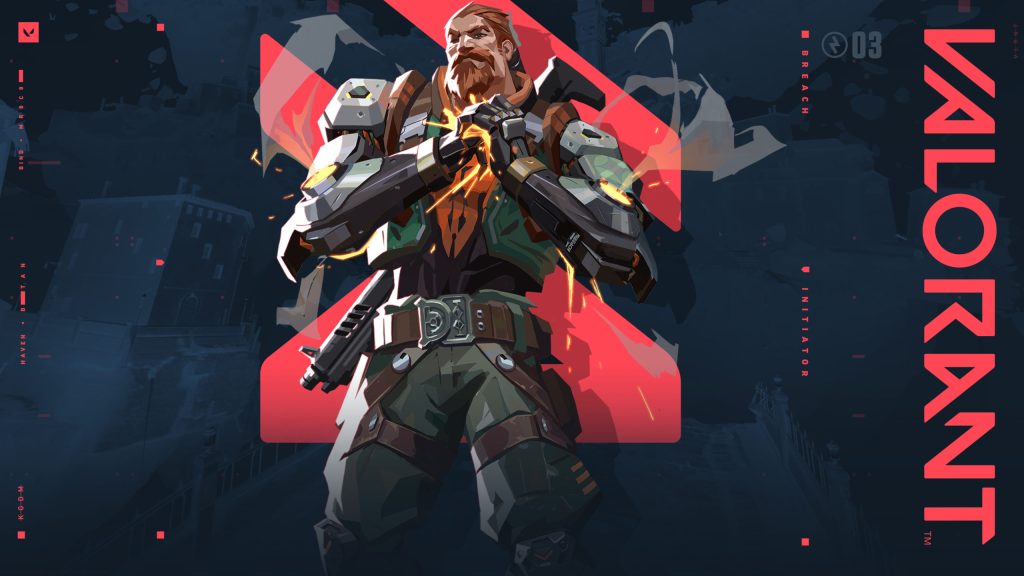
Role: Initiator
Signature Ability: Flashpoint
Breach excels at completely halting enemy pushes and setting up ambushes for his team. His kit requires a good mastery of map knowledge and having a competent team to follow up on these skills.
Skills:
- Flashpoint: EQUIP a blinding charge. FIRE the charge to set fast-acting burst through the wall. The charge detonates to blind all players looking at it. Charge/s: 2 (N/A Ability Recharge)
- Fault Line: EQUIP a seismic blast. HOLD FIRE to increase the distance. RELEASE to set off the quake, dazing all players in its zone and in a line up to the zone. Charge/s: 1 (40s Ability Recharge)
- Aftershock: EQUIP a fusion charge. FIRE the charge to set a slow-acting burst through the wall. The burst does heavy damage to anyone caught in its area. Charge/s: 1 (N/A Ability Recharge)
- Rolling Thunder (Ultimate): EQUIP a seismic charge. FIRE to send a cascading quake through all terrain in a large cone. The quake dazes and knocks up anyone caught in it. Charge/s: 1 (7 Ultimate Points)
Quick Tips:
- Coordination and communication with your team is key. If you aren’t on the same page with your timings, disaster can occur since your CC affects all agents, including your allies.
- Use the range indicators on your minimap to improve your precision when casting your abilities.
- Breach is one of the few agents that can interrupt an enemy that is planting or defusing the spike. Listen closely for sound cues to increase your odds of stopping them in time.
- Jett Tailwind and Breach Aftershock is a lethal combo. Jett dashing into stunned enemies provides free kills every time.
Recommended Maps:
- Fracture
- Haven
- Split
Breach can be one of the best agents in the game if provided with a good team but relies very hard on team composition and constant player callouts.
Viper
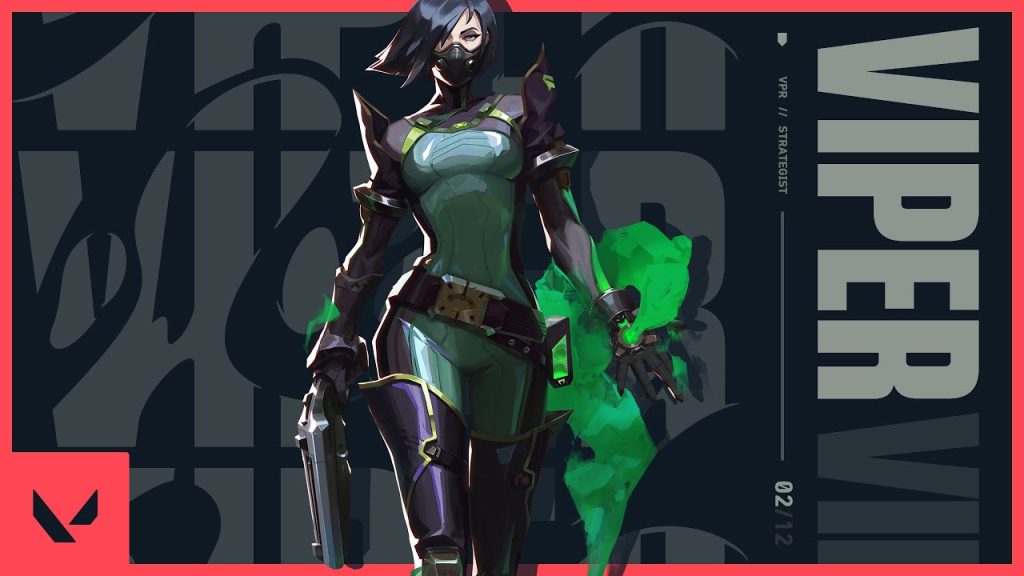
Role: Controller
Signature Ability: Toxic Screen
Viper can manipulate her battlefield using the various toxic and poison gases she has at her disposal making her one of the best characters in the game for controlling the battlefield.
Skills:
- Toxic Screen – EQUIP a gas emitter launcher. FIRE to deploy a long line of gas emitters. RE-USE the ability to create a tall wall of toxic gas at the cost of fuel. This ability can be RE-USED more than once.Charge/s: Unlimited (2s Ability Recharge)
- Snake Bite – EQUIP a chemical launcher. FIRE to launch a canister that shatters upon hitting the floor, creating a lingering chemical zone that damages and slows enemies.Charge/s: 2 (N/A Ability Recharge)
- Poison Cloud – EQUIP a gas emitter. FIRE to throw the emitter that perpetually remains throughout the round. RE-USE the ability to create a toxic gas cloud at the cost of fuel. This ability can be RE-USED more than once and can be picked up to be REDEPLOYED. Charge/s: 1 (8.8s Ability Recharge)
- Viper Pit – EQUIP a chemical sprayer. FIRE to spray a chemical cloud in all directions around Viper, creating a large cloud that reduces the vision range and maximum health of players inside of it. Charge/s: 1 (7 Ultimate Points)
Quick Tips:
- Viper really rewards players who spend time researching and practicing different ability lineups on different maps. Make sure to add these to your repertoire and become comfortable enough to execute them at the speed of a real match.
- Toxic Screen’s range is very large and can be safely shot from across the map. Because of this, she’s one of the few agents that can help hold multiple sites at once. For example, Toxic Screen can simultaneously block the entrance to B and C on Haven.
- Remember that Viper’s toxic gas deals decay damage. Decay damage causes an agent’s health to fall to 1 HP but they cannot be killed by the gas alone. This means that once an agent leaves the gas, their health will gradually replenish back to what it was before they entered it.
Recommended Maps:
- Bind
- Breeze
- Icebox
- Fracture
Viper’s insane map control and team utility make her an extremely valuable asset to her team that can be the winning piece of a match with proper communication and team play.
A-Tier:
Some of the agents in the A-tier are really good and they could have easily made it to the top tier if I was feeling up to it, but we will add them to the second tier for now. This is a well-balanced lot with plenty of great skills to look for. The A-Tier includes Chamber, Sage, and Reyna.
Jett

Role: Duelist
Signature Ability: Tailwind
Jett is one of the best, if not the best duelist in Valorant due to her super fast speed and vertical mobility. Her ultimate “Knives Out” by Rian Johnson is one of the best ults in the game due to its insane damage.
Skills:
- Tailwind – INSTANTLY propel Jett in the direction she is moving. If Jett is standing still she will propel forward. Charge/s: 1 (2 Kills Ability Recharge)
- Updraft – INSTANTLY propel Jett high into the air. Charge/s: 2 (N/A Ability Recharge)
- Cloudburst – INSTANTLY throw a projectile that expands into a brief vision-blocking cloud on impact with a surface. HOLD the ability key to curve the smoke in the direction of your crosshair. Charge/s: 2 (N/A Ability Recharge)
- Blade Storm – EQUIP a set of highly accurate throwing knives that recharge on killing an opponent. FIRE to throw a single knife at your target. ALTERNATE FIRE to throw all remaining daggers at your target. Charge/s: 1 (7 Ultimate Points)
Quick Tips:
- Jett has a hidden passive of being able to glide when you hold the jump key. Use this to mix up your movement and avoid taking fall damage.
- Spend time to really get comfortable with curving your Cloudburst smokes to key locations like heaven on maps like Haven and Bind. They have the shortest duration compared to all the other smoke grenades so precision is key to get the most out of them.
- Your Updraft and Tailwind can be used simultaneously and in combination with each other. Consider experimenting with different keybinds to find the best setup that let’s you abuse this.
- Use you updraft to get onto angles that the enemy would normally not clear. These off-angles are crucial to getting free and easy pick setting up your teams for a comprehensive win.
- Jett with an Operator is a menace to go against her. Tailwind is incredibly overpowered. Use them in combination and hold angles that are normally not even safe for 90% of the agent pool. Even if you miss you still have a get-out-of-jail-free card in the form of a Tailwind. This is what makes Jett op’ers extremely hard to punish.
Recommended Maps:
- Every map
Jett is one of the best agents in the game capable of engaging and disengaging duels whenever she pleases due to her insane mobility. However, after the recent nerfs in the latest 4.08 update, Jett has fallen off from the S-tier and is stuck between the A and B tiers.
Chamber
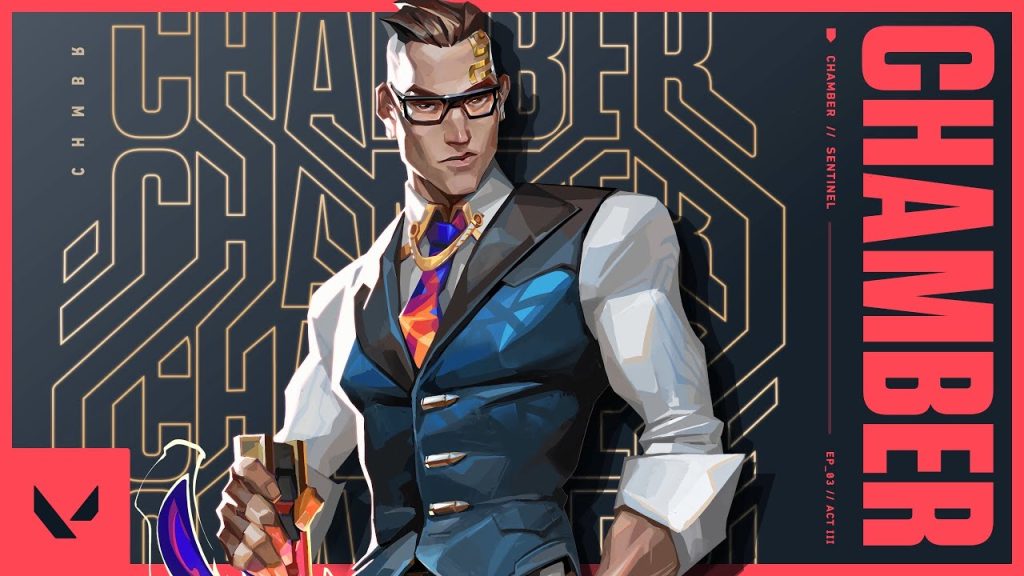
Role: Sentinel
Signature Ability: Rendezvous
Chamber is one of the best sentinel characters in the game capable of taking the fight on his terms and escaping the battlefield when things begin to get dicey.
Skills:
- Rendezvous – PLACE two teleport anchors. While on the ground and in range of an anchor, REACTIVATE to quickly teleport to the other anchor. Anchors can be picked up to be REDEPLOYED.Charge/s: 2 (20s Ability Recharge)
- Trademark – PLACE a trap that scans for enemies. When a visible enemy comes in range, the trap counts down and then destabilizes the terrain around them, creating a lingering field that slows players caught inside of it.Charge/s: 2 (N/A Ability Recharge)
- Headhunter – ACTIVATE to equip a heavy pistol. ALT FIRE with the pistol equipped to aim down sights. Charge/s: Unlimited (Max 8 Bullets)
- Tour de Force – ACTIVATE to summon a powerful, custom sniper rifle that will kill an enemy with any direct hit. Killing an enemy creates a lingering field that slows players caught inside of it. Charge/s: 1 (7 Ultimate Points)
Quick Tips:
- Chamber can be a very hard character to play for many players due to his high aim requirement, we recommend players to brush up on their aim first before deciding if they want to continue playing him or not.
- Chamber’s teleports can be effectively utilized to quickly enter and run away from engagements.
- When anchoring a site make sure to place your Trademark at the choke points. As soon as the Trademark is triggered, peek off of it. The enemies are too preoccupied trying to break the trap setting you up for free kills.
Recommended Maps:
- Bind
- Breeze
- Icebox
- Split
Despite being a Sentinel, Chamber functions more like a frag focused character due to his reliance on weapon-centric abilities.
Sage
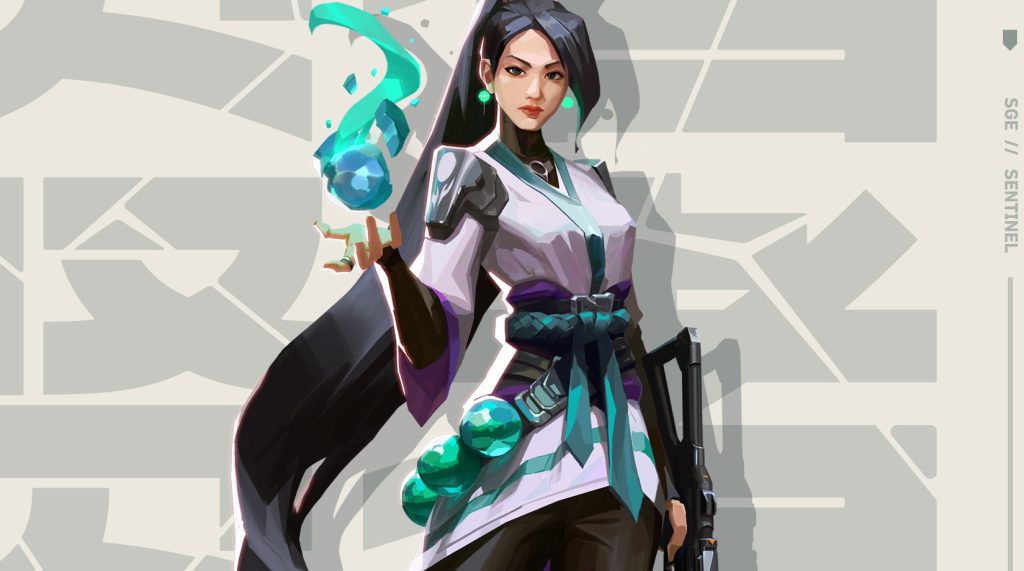
Role: Sentinel
Signature Ability: Heal Orb
Sage is one of the primary healers of the game. Sage’s extremely useful utility options allow her to be a good fit in almost every single team composition while also making for a good solo queue character.
Skills:
- Heal Orb – EQUIP a healing orb. FIRE with your crosshairs over a damaged ally to activate a heal-over-time on them. ALT FIRE while Sage is damaged to activate a self heal-over-time. Charge/s: 1 (45s Ability Recharge)
- Barrier Orb – EQUIP a barrier orb. FIRE places a solid wall. ALT FIRE rotates the targeter. Charge/s: 1 (N/A Ability Recharge)
- Slow Orb – EQUIP a slowing orb. FIRE to throw a slowing orb forward that detonates upon landing, creating a lingering field that slows players caught inside of it. Charge/s: 2 (N/A Ability Recharge)
- Resurrection – EQUIP a resurrection ability. FIRE with your crosshairs placed over a dead ally to begin resurrecting them. After a brief channel, the ally will be brought back to life with full health. Charge/s: 1 (8 Ultimate Points)
Quick Tips:
- When playing Sage, your allies will often rotate back to you for a Heal Orb. You can make their lives easier by communicating when your heal is available or on cooldown so they don’t waste their time.
- Look to use Slow Orb in combination with the AoE abilities of your allies, such as Brimstone’s Resurrection or Phoenix’s Hot Hands.
- Holding down the C button will allow you to rotate the placement of your Barrier Orb wall. Even if you don’t cast it after rotating, it will remain in the same position as you left it the next time you prepare to cast it. If you know where you’re going to wall ahead of time, you can use this to your advantage by already having it ready instead of having to rotate it when you get to your location.
- Standing on top of your Barrier Orb can provide a huge advantage to you. Not only does it throw off you opponent’s crosshair placement but the added benefit of falling off the wall for a quick retreat if thighs don’t go your way.
Recommended Maps:
Due to Sage’s versatility as a healer she can excel in most maps of the game.
Having a Sage on your team can usually mean the difference between life and death. Her Ultimate is one of the strongest in the game letting her revive any dead teammate to turn the odds against the enemy team.
Reyna
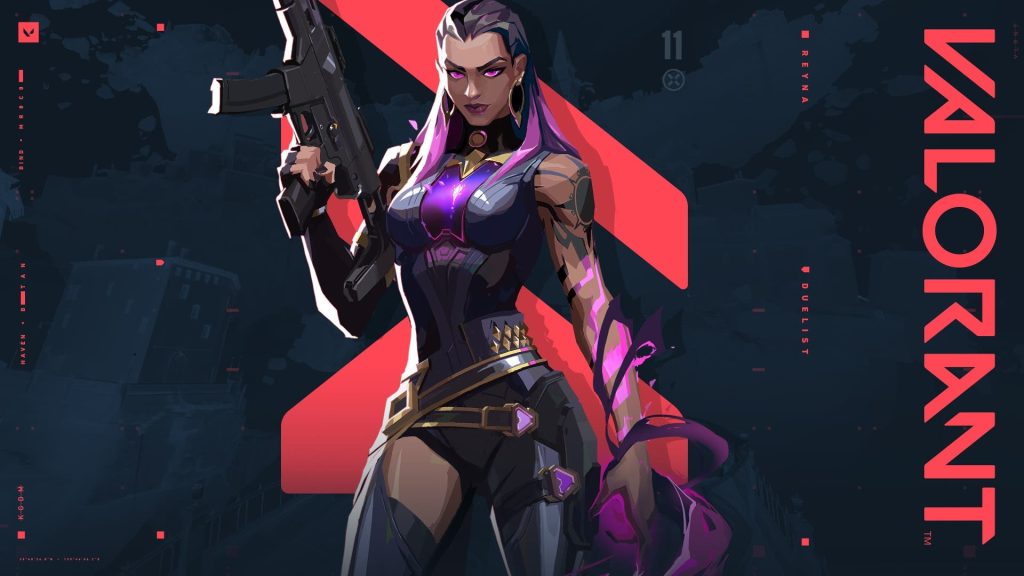
Role: Duelist
Signature Ability: Dismiss
Reyna is an excellent duelist character that offers a great lone wolf playstyle for Solo Queue players. She can heal off the kills she can gets while also getting a powerful flash that enemies have to actually shoot out of the air.
Skills:
- Dismiss – INSTANTLY consume a nearby Soul Orb, becoming intangible for a short duration. If Empress is active, she also becomes invisible. Charge/s: 2 ( N/A Ability Recharge)
- Leer – EQUIP an ethereal, destructible eye. ACTIVATE to cast the eye a short distance forward. The eye will Nearsight all enemies who look at it. Charge/s: 2 (N/A Ability Recharge)
- Devour – Soul Harvest: Enemies Killed by Reyna leave behind Soul Orbs that last 3 seconds. Devour: INSTANTLY consume a nearby soul orb, rapidly healing for a short duration. Health gained through this skill exceeding 100 decay over time. If Empress is active, this skill will automatically cast and not consume the Soul Orb. Charge/s: 2 (N/A Ability Recharge)
- Empress – INSTANTLY enter a frenzy, increasing firing, equip and reload speed dramatically. Gain infinite charges of Soul Harvest abilities. Scoring a kill renews the duration. Charge/s: 1 (6 Ultimate Points)
Quick Tips:
- Leer is an incredible engagement tool since it doesn’t affect your allies. Be sure to communicate and coordinate your pushes to maximize its effect.
- Since enemies can destroy it, try to cast Leer up in the air or away from you. This will help split their gaze as you peek.
- Wondering whether to use Devour or Dismiss? In general, if you have some room to breathe after a fight, choose Devour. If you land a kill but you’re still in danger, avoid giving the enemy team a trade by using Dismiss and escaping to cover.
- You can cancel your Dismiss early by pressing the “E” button again. Using this before you turn a corner can help when you are being chased down and ready you up to fight earlier.
Recommended Maps:
Being a Duelist, Reyna can excel in pretty much every map given she’s in the hands of a player who can get consistent frags.
Reyna is a high risk/reward character that rewards consistent frags but can be downright useless if she’s not getting frags.
Harbor
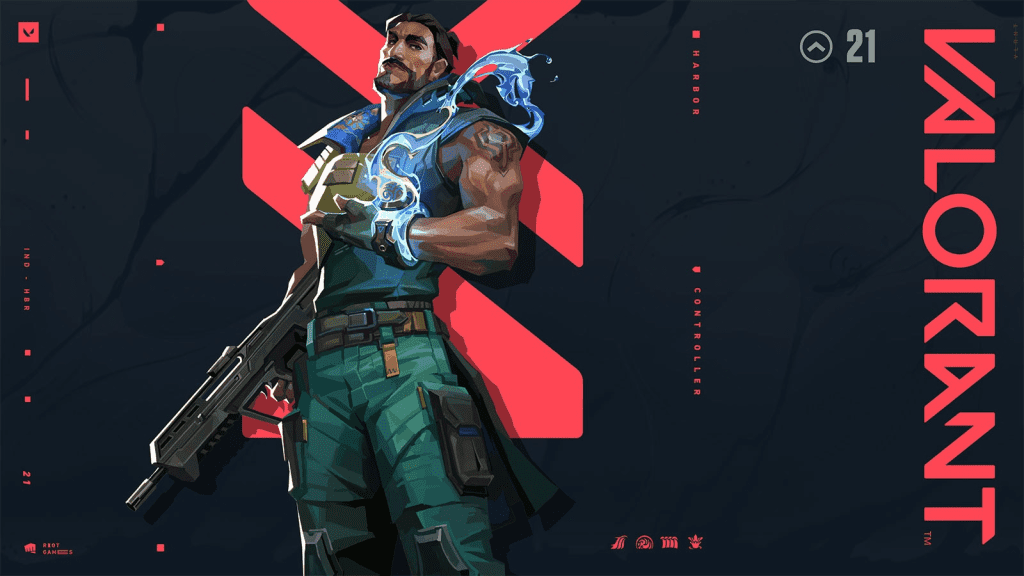
Role: Controller
Signature Ability: Reckoning
Harbor is one of the latest addition to the Valorant’s controller roster and there are already some pretty serious thoughts about him being the new Viper. Harbor is from the Coastline of India and has the ability to control water at will. His abilities are superb when it comes to site control and with a little practice, he is going to be an abomination.
Skills:
- High Tide – EQUIP a wall of water. FIRE to send the water forward along the ground. HOLD FIRE to guide the water in the direction of your crosshair, passing through the world, and spawning a wall along the water’s path. ALT FIRE while bending to stop the water early. Players hit are SLOWED Charge/s: 1 (N/A Ability Recharge)
- Cove – EQUIP a sphere of shielding water. FIRE to throw. ALT FIRE to underhand throw. Upon impacting the ground, spawn a destructible water shield that blocks bullets. Charge/s: 1 (N/A Ability Recharge)
- Cascade – EQUIP a wave of water. FIRE to send the wave rolling forward and through walls. RE- USE to stop the wave. Players hit are SLOWED. Charge/s: 1 (N/A Ability Recharge)
- Reckoning – EQUIP the full power of your Artifact. FIRE to summon a geyser pool on the ground. Enemy players in the area are targeted by successive geyser strikes. Players caught within a strike are CONCUSSED. Charge/s: 1 (7 Ultimate Points)
Quick Tips:
- One of the main reasons why Harbor is better than Viper is that High Tide ability which is similar to Viper’s Tox Screen is simply better than Viper’s ability. Though you can curve Viper’s Tox Screen with a bit of practice, Harbor’s high tide is much more easier to control and that is why you should never use it in a straight line. Assess the current situation and curve your High Tide to block lines of sites and gain an edge over the enemies.
- Don’t completely rely on Cove. Cove is Harbor’s ability to create a bulletproof water sphere but keep in mind that although it will block bullets for a couple of seconds but it will not do it forever so use it in situations you need it but be quick and don’t take cover behind it for more than a few seconds.
- Use the Cascade ability also to block lines of sights and you can camp on the other side of the Water Wall because when the enemy exits this ability, they will be slowed even if it is for 1 second but it is enough to give you an advantage and put a bullet in their head.
- Harbor’s ultimate might not be great when it comes to slowing down and concussing enemies and it can also easily be dodged but if you look at the bigger picture, it can be used to reveal enemies’ locations in a certain area and while the enemy is busy trying to avoid the ability, you can push and deal with them during that time.
Recommended Maps:
- Every map
Harbor is new and is still finding its place in the tier list. Everyone is still getting comfortable with him and currently, his abilities such as High Tide and Cove are simply better than Viper’s so that is why he is above her but there are good chances of him being nerfed in the next update.
S-Tier:
These are the very best of the best available agents you can choose. These agents are extremely solid picks for just about any situation, map, or case scenario applicable to every single team composition. The S-Tier includes Skye, Sova, Jett, Fade.
Skye
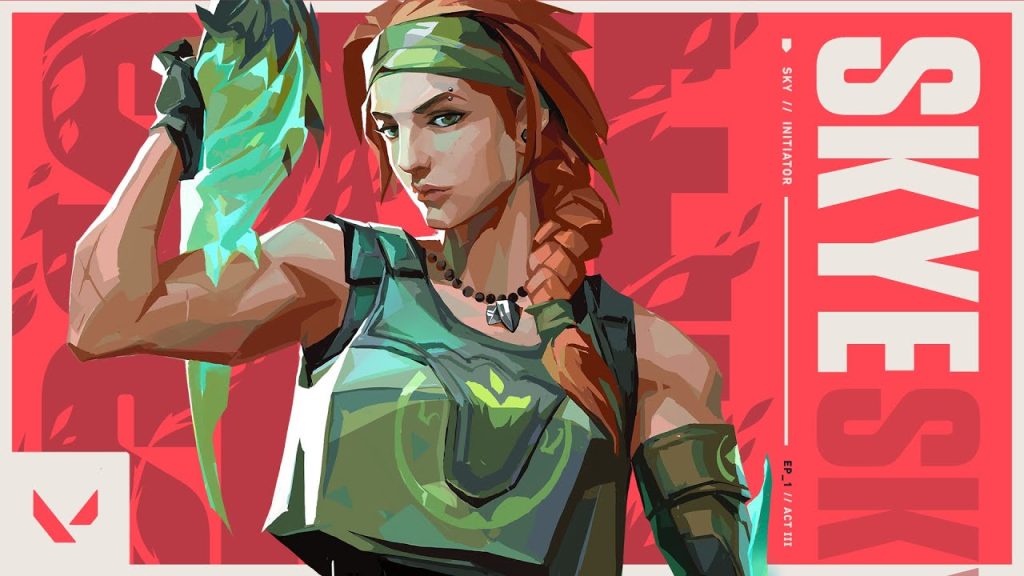
Role: Initiator
Signature Ability: Guiding Light
Skye is a support initiator that sets up engagements using her multiple flashes and keeps her team in the fray with her multi-healing ability. Skye is also the only agent in Valorant who can heal multiple teammates at once. If being a team player isn’t up to you speed Skye is an excellent pseudo-duelist.
Skills:
- Guiding Light – EQUIP a hawk trinket. FIRE to send it forward. HOLD FIRE to guide the hawk in the direction of your crosshair. RE-USE while the hawk is in flight to transform it into a flash. Charge/s: 2 (40s Ability Recharge)
- Regrowth – EQUIP a healing trinket. HOLD FIRE to channel, healing allies in range and line of sight. Can be reused until her healing pool is depleted. Skye cannot heal herself. Charge/s: 1 (N/A Ability Recharge)
- Trailblazer – EQUIP a Tasmanian tiger trinket. FIRE to send out and take control of the predator. While in control, FIRE to leap forward, exploding in a concussive blast and damaging directly hit enemies. Charge/s: 1 (N/A Ability Recharge)
- Seekers – EQUIP a Seeker trinket. FIRE to send out three Seekers to track down the three closest enemies. If a Seeker reaches its target, it nearsights them. Charge/s: 1 (7 Ultimate Points)
Quick Tips:
- Her healing pool from Regrowth depletes at the same rate whether you’re healing one or four allies, so try to maximize it by healing multiple at once when possible.
- Skye’s Guiding Light hawks can be destroyed so you can not only use them to engage as flashes, but you can also use them to gain general information by forcing enemies in an area to destroy them.
- Communication is key in Valorant, even more so with agents like Skye. You’ll get much more value out of her engaging abilities if you coordinate with your team.
- Skye’s flashes can be deployed early. Like really early. This mechanic is the most important thing to master if you want to use Skye to her full potential. This gives the enemy team no time to even think about turning the flash and is incredibly overpowered in any situation.
Recommended Maps:
- Bind
- Split
- Fracture
- Haven
- Ascent
SkSkye is an excellent support character that can start engagements for her team and with proper communication can be one of the key aspects to victory in a match.
Sova
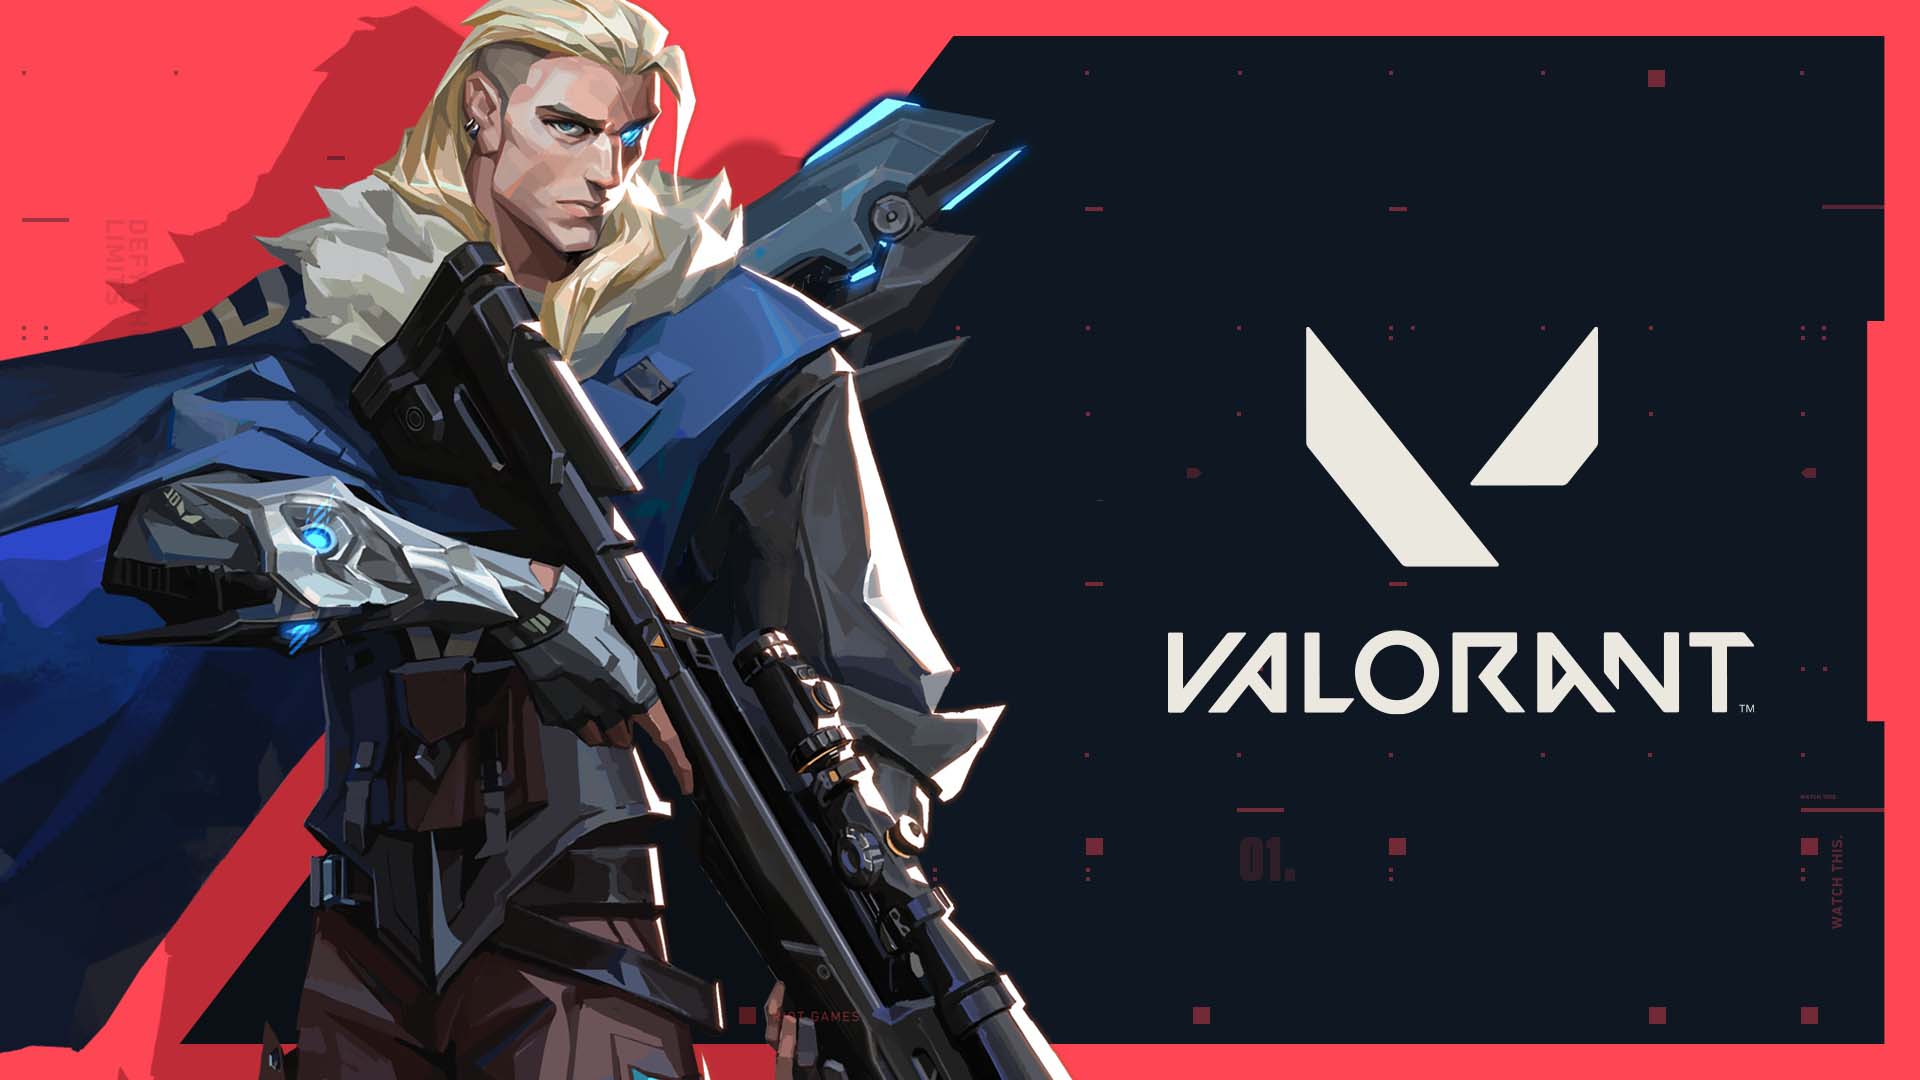
Role: Initiator
Signature Ability: Recon Bolt
Sova is an Initiator that functions as a recon character for the team due to his recon bolt capable of tracking enemies through walls.
Skills:
- Recon Bolt – EQUIP a bow with recon bolt. FIRE to send the recon bolt forward, activating upon collision and revealing the location of nearby enemies caught in the line of sight of the bolt. Enemies can destroy this bolt. HOLD FIRE to extend the range of the projective. ALTERNATE FIRE to add up to two bounces to this arrow. Charge/s: 1 (40s Ability Recharge)
- Owl Drone – EQUIP an owl drone. FIRE to deploy and take control of movement of the drone. While in control of the drone, FIRE to shoot a marking dart. This dart will reveal the location of any player struck by the dart. Charge/s: 1 (N/A Ability Recharge)
- Shock Bolt – EQUIP a bow with a shock bolt. FIRE to send the explosive bolt forward, detonating upon collision and damaging players nearby. HOLD FIRE to extend the range of the projectile. ALTERNATE FIRE to add up to two bounces to this arrow. Charge/s: 2 (N/A Ability Recharge)
- Hunter’s Fury – EQUIP a bow with three long-range, wall-piercing energy blasts. FIRE to release an energy blast in a line in front of Sova, dealing damage and revealing the location of enemies caught in the line. This ability can be RE-USED up to two more times while the ability timer is active. Charge/s: 1 (8 Ultimate Points)
Quick Tips:
- When you fire your Recon Bolt, remember that just because an enemy isn’t revealed doesn’t mean that they aren’t nearby. Players will often wait until its radar effect ends before pushing, so don’t fall into a false sense of security.
- Sova’s abilities combo well into each other. Try to locate an enemy with his Owl Drone or Recon Bolt to find targets for his Shock Bolt or Hunter’s Fury.
- When using Hunter’s Fury, there will be a range indicator on your minimap to help you guide your aim. Use this to your advantage to line up shots across the map.
Recommended Maps:
- Ascent
- Breeze
- Haven
- Icebox
Sova is one of the best sentinel characters in Valorant. His kit offers incredible utility and his ultimate can make for some crazy plays if used correctly.
Fade
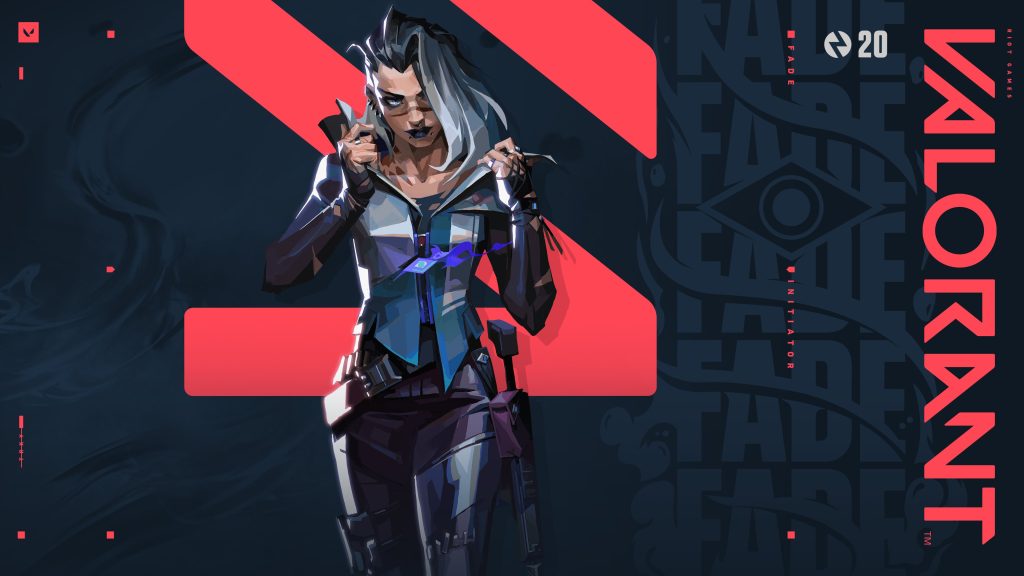
Role: Initiator
Signature Ability: Haunt
Fade is the latest Agent in Valorant and her kit is extremely strong, making her an incredibly powerful and fun character focused on both offense and intel gathering skills.
Skills:
- Prowler: FIRE after equipping to send a creature out which will travel in a straight line looking for enemies AND/OR Trails. HOLD FIRE AND MOVE MOUSE to steer the creature in the direction you are facing. When the creature finds a trail or enemy, it will move toward them. Upon reaching the enemy, it will start a .5s cook time and then NEARSIGHT the closes enemy for 3s. Only one Creature can latch onto a TRAIL ever.
- Seize : EQUIP an orb. FIRE to throw the orb. The orb will travel in the air a max time of ??.s until dropping to the ground. Upon hitting the ground it will stuck in place and begin to cook for .5s After .5s a zone will expand out to 7m and all enemies caught will be tethered to the center. Tethered enemies suffer 75 decay damage, are deafened, and cannot escape the zone by normal means for 5s. Can be reactivated in flighty to drop earlier.
- Haunt: This ability equips an orb. FIRE to throw the orb. The orb will travel in the air a max time of 1.5s until dropping to the ground. Once it hits the ground, it raises back up and turns into an Eye that can be destroyed. If the Eye sees opponents, it will REVEAL them and apply TRAIL debuff that lasts 12s. Can be reactivated in flight to drop the projectile earlier.
- Nightfall: EQUIP this ability. FIRE to send out a wave of dark mist. If the mist comes in contact with an enemy, they will be TRAILED, DEAF, and DECAYED for 12s.
Quick Tips:
Unfortunately, Fade is extremely new to the game, so we can’t really write any tips for her as of now but we assume her playstyle. As soon as more players get familiar with the game, we will update you with some tips to play Fade effectively.
Recommended Maps:
Considering her playstyle we can assume that Fade will be better on maps with more open spaces.
- Breeze
- Ascent
- Haven
We can anticipate that Fade is going to be a very successful character in the Valorant meta due to her excellent crowd control abilities.
And these are all the Agents in Valorant ranked for your convenience. Valorant is one of the biggest games in the online market right now with many professional players still playing it since its release.
We hope you found this guide helpful, for more guides about all the latest games, check out our Guides section! If your game is plagued with bugs and glitches, the following three guides might help you get rid of them:

